Published 30 Oct, 2026
Floor Tile Transition Ideas: How to Join Different Tiles Between Rooms | Passero Tiles & Bathware


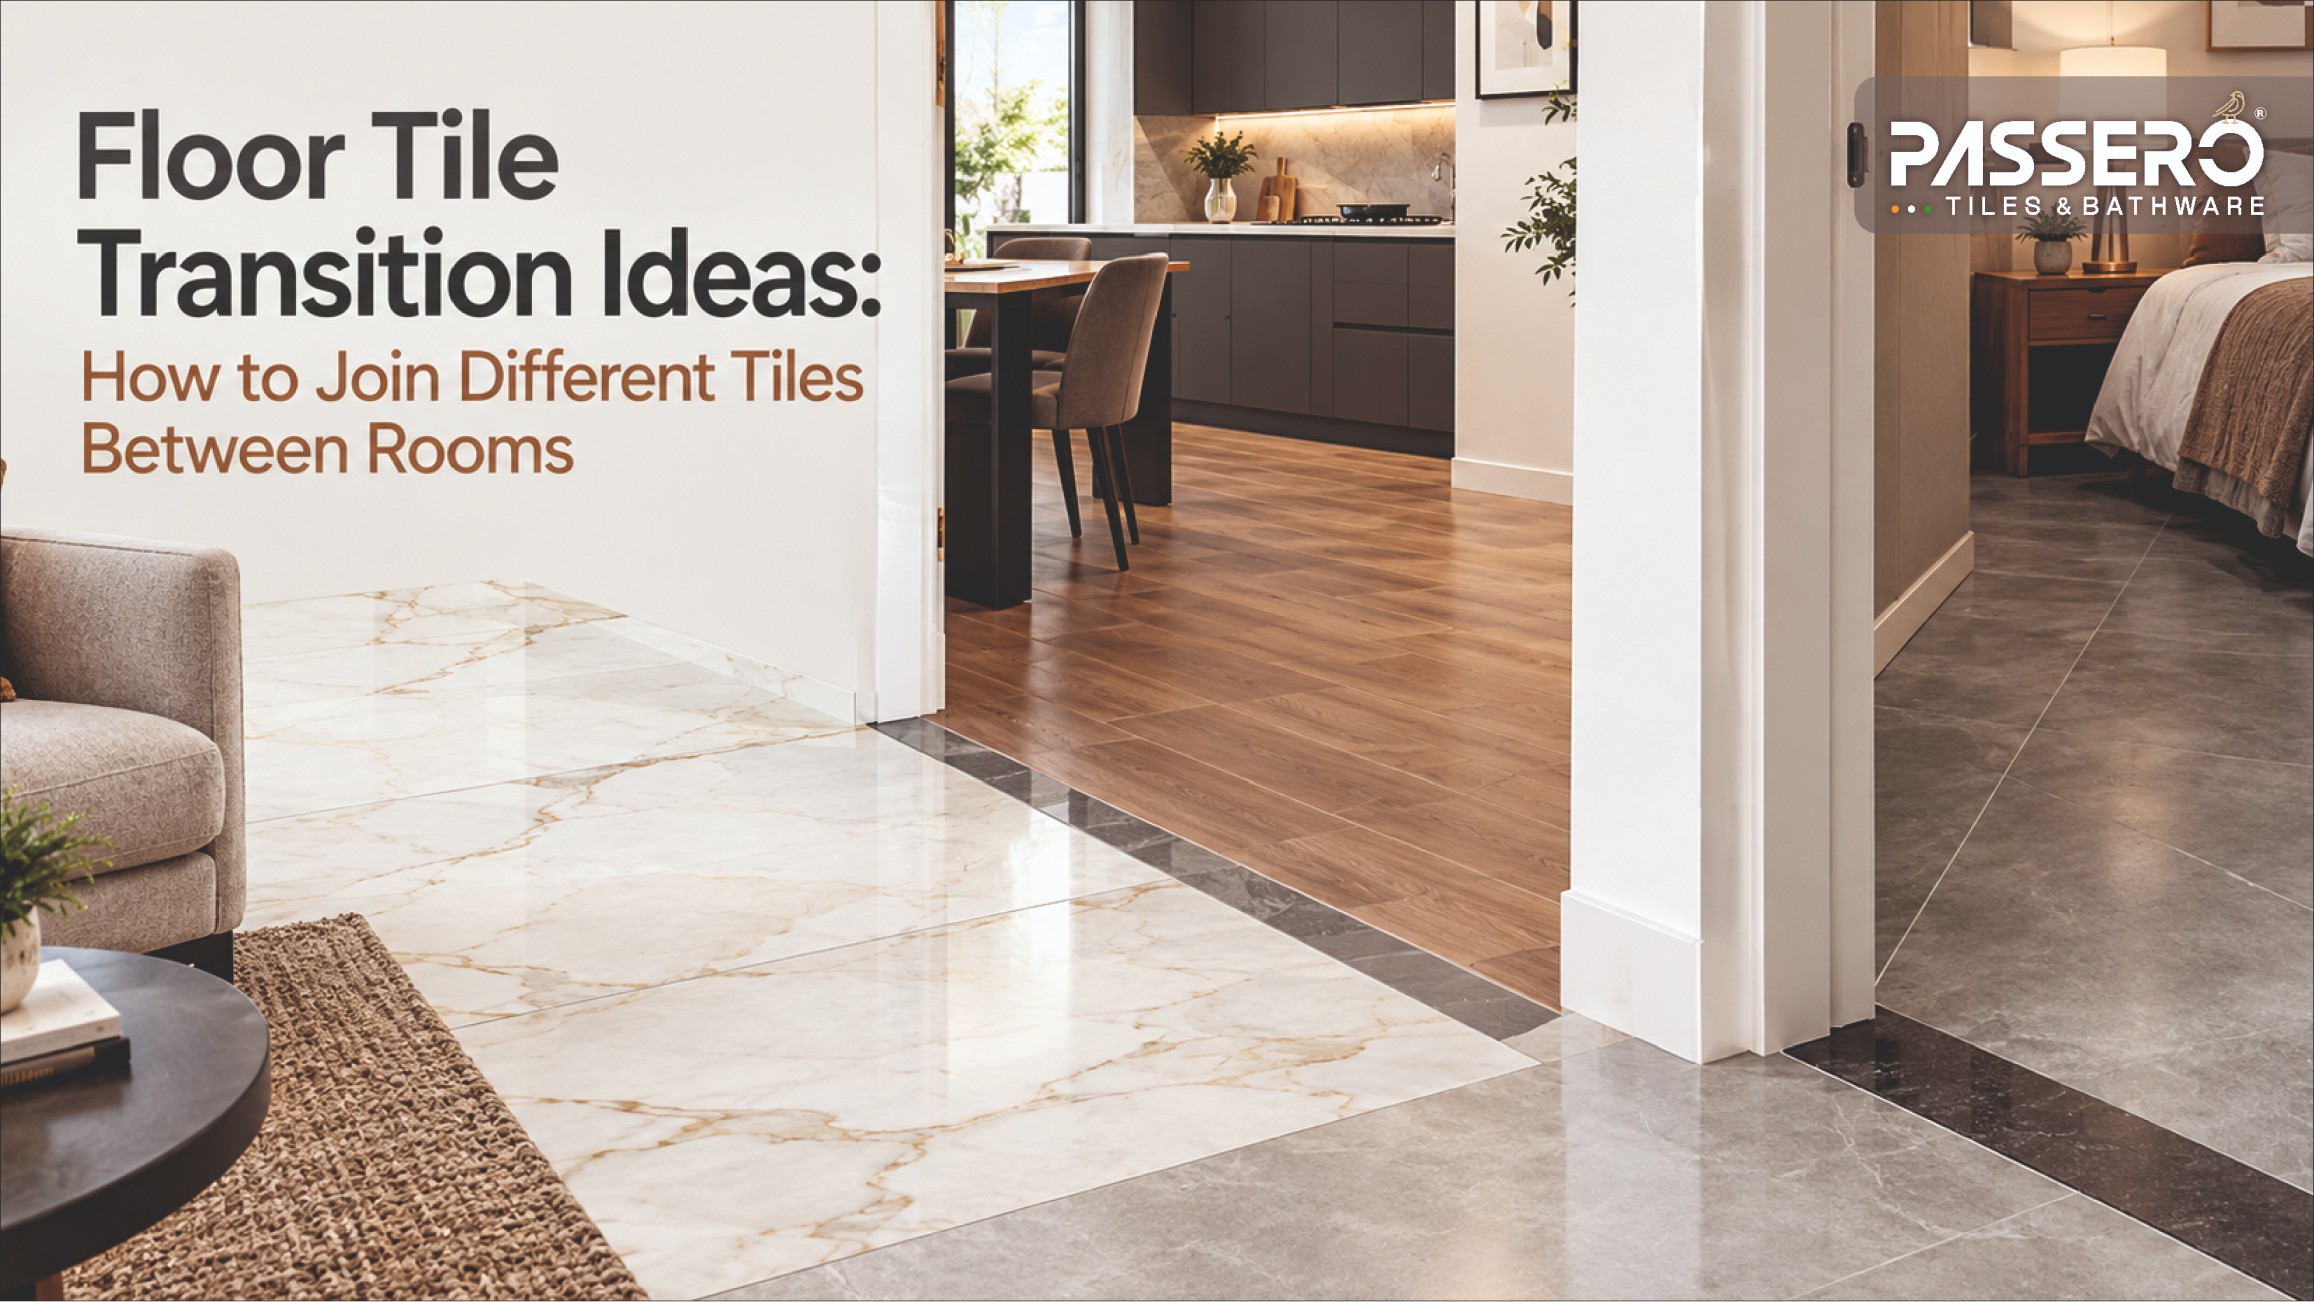
Choosing the right floor tiles is an important part of creating a beautiful and functional home. While some homeowners prefer the same tiles throughout their interiors, others like to combine different colours, patterns, finishes, and designs to give each room its own character. For example, wood-look tiles can create a warm bedroom atmosphere, marble-look tiles can enhance a living room, and patterned tiles can add personality to a kitchen.
However, when two different tile designs meet, the transition between them needs careful planning. A poorly planned boundary can make the flooring look uneven or disconnected, while a well-designed transition can create a seamless connection between adjoining spaces.
At Passero Tiles & Bathware, we understand how the right tile selection can transform residential and commercial interiors. Whether you are designing a modern apartment, renovating your home, or planning a stylish open-plan living space, understanding different floor tile transition ideas can help you achieve a balanced and attractive interior.
In this guide, we explore six practical and stylish ways to join different floor tiles between rooms, along with important installation tips to consider before starting your project.
What Is a Floor Tile Transition?
A floor tile transition is the point where two different tiled surfaces meet. The transition may involve a change in tile colour, pattern, size, texture, or laying direction. It can also connect floors with different finished heights.
For example, you might use light beige tiles in the living room and darker wood-look tiles in the bedroom. The point where these two surfaces meet becomes the floor tile transition.
A tile transition does not always require a decorative border or metal strip. Depending on the design and installation requirements, the tiles may meet directly along a planned boundary or use a suitable transition profile.
The main objective is to create a visually coordinated finish while ensuring that the flooring remains level where required, stable, and properly installed.
Floor Tile Transition Ideas for Modern Homes
Different tile transition designs can help define individual spaces while maintaining a consistent interior style. Here are six ideas to consider when combining different floor tiles in your home.
1. Straight-Line Transition Between Two Tile Designs
A straight-line tile transition is one of the simplest ways to connect two different flooring designs. In this approach, the tiles meet along a clean, straight boundary without an additional decorative border.
For example, you could install large-format marble-look tiles in the living room and wood-look tiles in an adjoining bedroom. A carefully planned straight line can separate the two designs without making the floor appear unnecessarily busy.
Where to use this transition:
- Between a bedroom and a passage.
- At doorways connecting two rooms.
- Between living and dining areas.
- In modern apartments with minimal interior designs.
For a professional finish, plan the transition according to the doorway position, tile dimensions, and grout lines. Aligning the boundary with the room layout can help create a more organised appearance.
2. Subtle Transitions Using Similar Tile Colours
If you prefer a coordinated interior, consider using tiles in similar colour families. This approach allows you to create separate visual zones without introducing a strong contrast between adjoining rooms.
For example, light beige tiles in the living room can complement slightly darker beige tiles in the dining area. Similarly, grey tiles in one space can transition into a lighter grey design in another.
The difference between the two surfaces remains visible, but the overall flooring looks more harmonious.
Design ideas to consider:
- Beige marble-look tiles with warm neutral tiles.
- Light grey tiles with darker grey designs.
- Cream-coloured flooring with subtle stone-look patterns.
- Wood-look tiles combined with complementary neutral shades.
This type of tile-to-tile transition works particularly well in open-plan homes where the living room, dining area, and kitchen share a connected layout.
Selecting tiles with complementary colours, finishes, and textures can help maintain a consistent design throughout your home.
3. Geometric and Pattern-Based Tile Transitions
For homeowners who want something more distinctive, geometric and pattern-based tile transitions can add character to interior flooring.
Instead of relying only on colour differences, this approach uses the arrangement and shape of the tiles to define the boundary between spaces.
For instance, hexagonal tiles can meet a conventional rectangular tile layout to create a decorative edge. Similarly, herringbone-patterned flooring can transition into straight-laid tiles in an adjoining area.
Pattern-based transitions can work beautifully when you want the flooring itself to become a design feature.
Popular pattern combinations include:
- Hexagonal tiles with plain rectangular tiles.
- Herringbone layouts with straight-laid flooring.
- Geometric patterned tiles with neutral marble-look tiles.
- Decorative tiles combined with simple, solid-colour designs.
To achieve the desired appearance, finalise the pattern before installation. Complex layouts may require additional tile cutting and precise alignment. The installer should also account for appropriate grout joints and any required movement joints.
4. Border Tiles Between Different Flooring Designs
Border tiles offer a decorative way to separate two different floor tile designs. Instead of allowing both surfaces to meet directly, you can introduce a narrow row of tiles between them.
For example, charcoal grey border tiles can separate white marble-look flooring in a living room from patterned tiles in an adjoining dining area.
A border can create a clear visual boundary while adding another design element to the flooring.
Ideas for using border tiles:
- Dark borders between light-coloured flooring designs.
- Neutral borders that complement both adjoining tile colours.
- Decorative borders around selected floor areas.
- Narrow rectangular tiles between contrasting patterns.
The border does not always need to be highly contrasting. A complementary shade can create a subtle transition, while a darker border can provide a more defined separation.
Before installation, check the border width against the surrounding tile dimensions. Proper planning can reduce awkward cuts and help maintain alignment across the floor.
5. Metal Transition Strips and Profiles
Metal transition strips are another option for finishing the junction between different tiled surfaces. They can provide a neat edge and help protect exposed tile edges when the selected profile is suitable for the application.
Common options include aluminium, stainless steel, and brass-finish profiles. The right choice depends on the interior design, the flooring arrangement, and the intended use.
For example, a slim metal profile can complement contemporary interiors featuring large-format tiles, neutral colours, and clean architectural lines.
Important considerations when selecting a transition profile:
- Check whether both finished floors are at the same height.
- Choose a profile suitable for the flooring materials involved.
- Confirm that the profile accommodates the joint dimensions.
- Consider the profile's finish and compatibility with the overall design.
- Ensure that the installation does not create an unintended trip hazard.
A T-shaped profile may be suitable for certain same-level transitions, while a height-adjusting profile may be required when the finished surfaces differ in elevation.
Always check the manufacturer's installation instructions and the installer’s recommendations before selecting a metal transition strip.
6. Flush Tile Transitions Without a Raised Threshold
A flush tile transition allows two tiled floors to meet at the same finished level without a raised threshold between them.
This approach is popular in contemporary interiors because it creates a clean visual connection between adjoining spaces. Different tile colours, patterns, or sizes can still be used to define each area.
For example, you could connect the living room and dining area using two complementary tile designs while maintaining a consistent finished floor height.
Benefits of flush tile transitions include:
- A clean and uninterrupted floor appearance.
- Better visual continuity between adjoining rooms.
- No unnecessary raised threshold at the transition.
- Greater flexibility when combining different tile designs.
However, a flush transition requires careful planning of the floor build-up, tile thickness, adhesive layer, and substrate. The installer must also provide all required movement joints.
A decorative grout line or flush finish must not replace a movement joint where one is required. Proper installation is essential for a durable and visually consistent result.
How to Join Different Floor Tiles Between Rooms
Selecting two attractive tile designs is only the first step. To create a professional-looking transition, you also need to consider the technical details before installation.
Here are five important factors to review.
1. Check the Finished Floor Heights
Before installing different floor tiles, compare the expected finished heights of both areas.
Tiles may have different thicknesses, but the final floor levels also depend on the substrate, adhesive thickness, and other installation layers.
If one surface is higher than the other, the installer should determine how to manage the difference safely. Depending on the application, adjustments to the floor build-up or a suitable transition profile may be necessary.
Planning the finished heights in advance can help avoid unwanted steps and uneven boundaries.
2. Decide Where the Tiles Should Meet
The location of the transition can influence the overall appearance of the flooring.
In rooms connected by a door, the doorway is often a practical location for the change in tile design. In open-plan spaces, the transition can follow a natural division between functional areas.
For example, you might use one tile design for the living area and another for the kitchen. Positioning the boundary near the kitchen's planned layout can help define the two spaces without introducing a physical partition.
Before finalising the location, consider furniture placement, room dimensions, tile sizes, and grout-line alignment.
3. Choose the Right Transition Method
Not every tile transition needs the same finishing method.
A straight joint may suit two compatible tile layouts at the same level. A decorative border can create a stronger design separation, while a suitable metal profile may help finish certain joints or accommodate a planned change in floor height.
Consider the tile edges, joint requirements, expected foot traffic, and intended appearance before choosing a solution.
The selected method should suit the installation rather than being chosen only for its visual appeal.
4. Plan Tile Sizes, Cuts, and Grout Lines
Tile dimensions can affect how cleanly two designs meet.
Large-format tiles, such as 600 × 1200 mm tiles, can create a spacious, contemporary appearance when their layout is planned carefully. However, the room dimensions and transition location should be checked to avoid narrow or awkward tile cuts.
Before installation, discuss the layout with your tile installer. Confirm the starting point, tile orientation, grout-joint alignment, and the position of the transition.
Good planning helps reduce unnecessary cutting and creates a more balanced flooring design.
5. Allow for Required Movement Joints
Movement joints are an important part of many tile installations. Changes in temperature, moisture, and structural movement can affect tiled surfaces, so the installation must accommodate movement wherever required.
A standard grout joint is not a substitute for a movement joint.
The installer should determine the appropriate joint locations and use suitable materials and detailing in accordance with the installation specifications.
Paying attention to these technical requirements helps support the long-term performance of the flooring.
How to Choose the Right Tiles for Different Rooms
The best tile combination depends on the purpose of each room, the interior style, and the amount of visual contrast you want to create.
Here are a few combinations to consider.
Living Room and Bedroom
Marble-look tiles in the living room can pair well with wood-look tiles in the bedroom. This combination brings together a refined appearance and the warmth of a natural wood-inspired design.
Living Room and Kitchen
Neutral tiles in the living room can complement patterned or darker tiles in the kitchen. A carefully positioned transition can distinguish the two areas while maintaining a coordinated interior.
Dining Area and Passage
You can use similar tile colours with different layouts to create a subtle transition between the dining area and passage.
Bathroom Entrance and Bedroom
When connecting these spaces, consider the finished floor heights, moisture-management requirements, and suitability of the selected flooring. A safe, properly detailed transition is more important than achieving a completely uninterrupted appearance.
Indoor and Outdoor Areas
Indoor and outdoor tiles should be selected according to their intended application, surface characteristics, and exposure conditions. When connecting these areas, consider drainage, weather exposure, slip resistance, and differences in finished floor levels.
Choosing suitable tile designs for each space and planning the transition together can help create a more cohesive interior.
Explore Modern Tile Designs at Passero Tiles & Bathware
Creating a beautiful tile transition begins with selecting designs that complement one another. Whether you prefer subtle neutral colours, elegant marble-look surfaces, wood-inspired patterns, or distinctive decorative designs, the right combination can help define each area of your home.
Passero Tiles & Bathware offers a range of tile designs for residential and commercial interiors, with options to suit different design preferences and applications.
Our tile collections include GVT and PGVT tiles, full-body tiles, wood-look designs, decorative tiles, and large-format options for a variety of interior requirements.
Our 600 × 1200 mm tile range offers possibilities for contemporary flooring and wall applications, depending on the selected product's specifications and suitability.
When planning a tile transition, consider more than the appearance of individual tiles. Colour coordination, tile dimensions, surface finish, installation requirements, and the overall room layout all contribute to the final result.
Explore tile designs from Passero Tiles & Bathware to find combinations that complement your interior vision.
Expanding Network Across India in
Passero Vitrified LLP is continuously growing to serve customers better and faster:
| Type | City /Area |
| Depots | Bengaluru, Hyderabad, Raipur, Coimbatore |
| Outlets | Ahmedabad, Surat, Indore , Ujjain |
| Shoppe | Rajkot, Pune |
| Dealers Network | Vadodara, Nagpur |
| Galleria | Jaipur, Palanpur |
Through this expanding presence, we ensure easy accessibility of premium tiles across the country.
Conclusion
Floor tile transitions are an important detail when combining different flooring designs throughout your home. From simple straight-line joints and subtle colour changes to decorative borders, patterned layouts, and metal profiles, several options can help connect adjoining spaces.
The right solution depends on your interior design, tile dimensions, finished floor heights, and installation requirements. Careful planning before installation can help create a clean, coordinated, and functional finish.
Whether you are renovating a home or planning a new interior, Passero Tiles & Bathware can help you explore tile designs that suit your preferred style and space.
Choose complementary designs, plan the transition carefully, and create interiors where every flooring detail works together.
Recent Posts

Wedding Season Home Makeover: Best Tiles for Guest-Ready Homes
28 Oct, 2026

800x2400mm Slab Tiles in India: Uses, Benefits & Installation Guide
25 Oct, 2026

Dhanteras Home Makeover 2026: Which Tiles to Buy and When to Lay Them
23 Oct, 2026

Renovating Before Diwali? 6 High-Impact Tile Designs for Your Home
21 Oct, 2026
Experience Passero in Person
Explore our exclusive brand stores designed to offer a curated and immersive tile selection experience. Discover premium collections, full-space mockups, and expert guidance to help you choose the perfect surfaces for your project.

Curated Displays - See tiles in real-life interior setups
Expert Assistance - Guidance from trained design consultants
Latest Collections - Access to our newest and premium ranges
